You can add family members, executive assistants, friends, or third parties (such as accountants or lawyers) to your vault as Trusted Collaborators. Collaborators can help you manage documents based on the access you grant.
Before assigning permissions, the person must first be added as a Contact inside your vault.
Contacts added by the vault owner / Co-Owner (family, CPA, lawyer, etc.) will:
Appear under your Contacts tab
Are not visible to company users by default, unless they also add the same contact.
If your vault was provided by a company, you may also see contacts listed under the Users tab. These are company users (Administrator / Representative).
Adding a Trusted Collaborator
Step 1: Go to the Contacts tab and either double-click an existing contact or select Add Contact.
After creating a contact, the system will ask if you would like to set permissions for this contact. Click Yes.

Step 2: If it already exist click the Edit Permissions button
Step 3: Choose Permissions
General Permissions: You can provide or remove access to other tabs in your vault, so your contact can help you more or see more information. Here is more information:
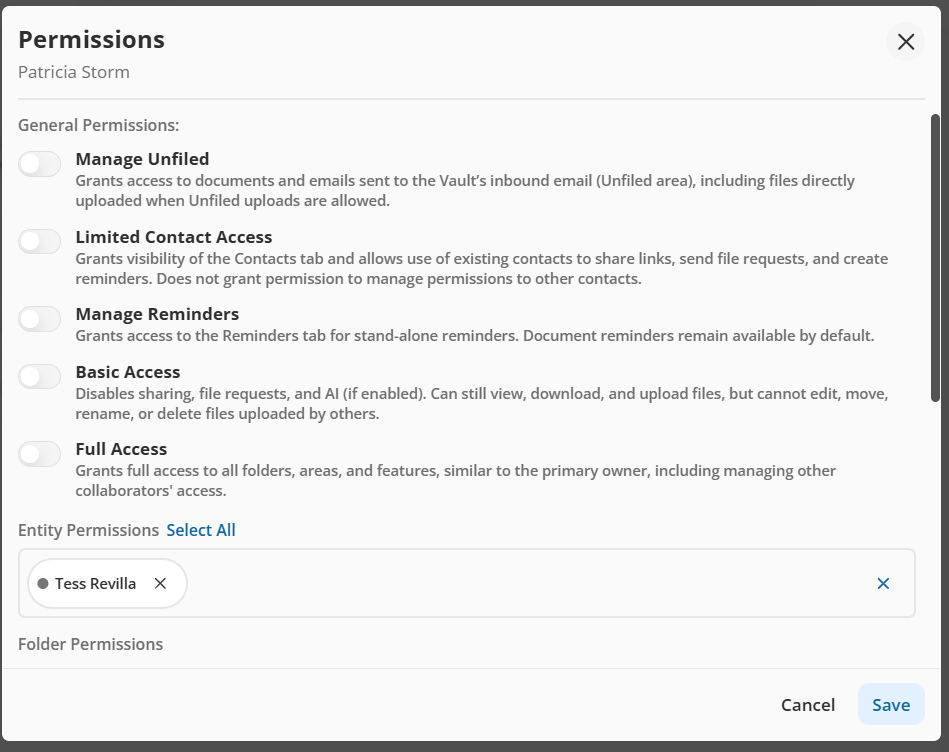
Entity Permission: If your vault contains multiple entities, you can restrict access to a single entity. The collaborator will only see documents linked to that entity, even if other documents exist in the same folder.
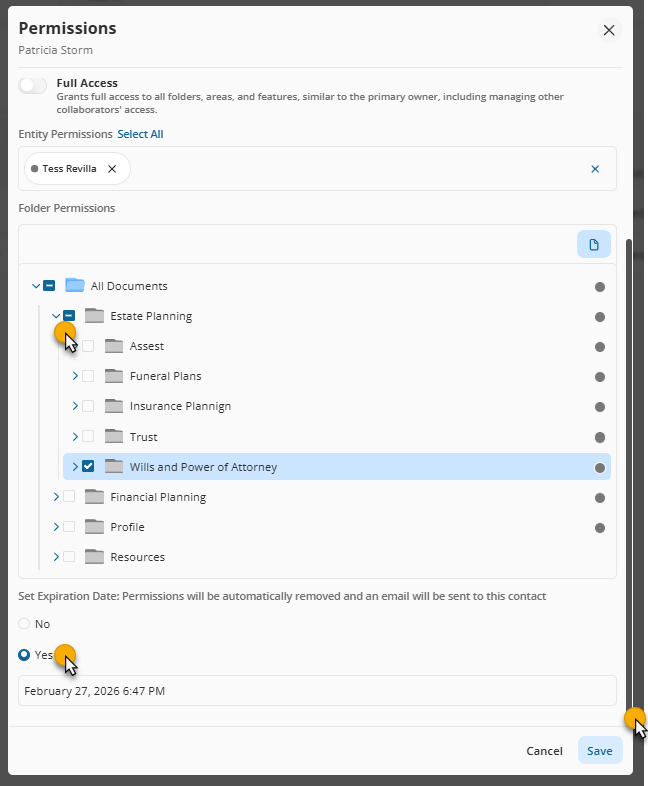
Folder Permissions - ensure to move the left bar:
Expand folders by clicking the arrow next to the folder name.
Selecting an entire category grants access to all subfolders (a checkmark will appear).
Use Document Visibility toggles to confirm that the files inside the folder have the entity you are giving access to.
Selecting only some subfolders displays a minus symbol, indicating partial access.
Set Expiration Date: Permissions will be automatically removed, and an email will be sent to this contact
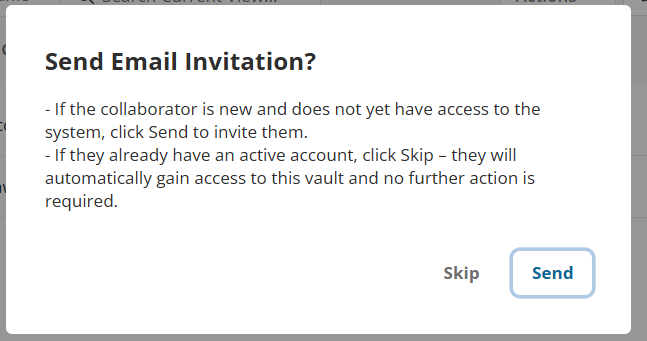
Step 4: Click Save and Send the Email notification
If this is the collaborator’s first time being added, select Send Invitation so they receive an email to activate their account and set a password.
If the collaborator has already activated their account, you can choose Skip Invitation—their new access will apply immediately.
Once confirmed, a Trusted Collaborator label will appear next to their name in your contact list. You can also filter by contact type in the list header. If the collaborator was added by a company user, an additional label will be added.